Windows Vista: Return to Windows XP
The software conflicts. The system becomes slow. Screen User Account Control (UAC) is hating. Are those great things for Windows Vista? A lot of people, after switching to Windows Vista, wish they had not changed, because their hardware is not yet able to run Vista smoothly. And wanting to return to the familiar and speedy interface of Windows XP is of course going to happen. There is no cost, just take a moment to read this tutorial, you can completely return to 'good friend' XP.
Before embarking on it, backup your system. At least burn it to a CD, if not better, you can use a USB flash drive or an external hard drive. A better option is to create an image of the entire hard drive using the Acronis TrueImage or Norton Ghost program , to be able to restore the entire system easily. If XP recovery fails, you can use the disk or image backup file to restore the system. Maybe still have to continue using Vista but 'there is more than nothing'.
Next, collect all the drivers you need. Remember that your computer has Vista installed so the software and installed drivers are compatible with Vista. Unless you have stored all the necessary drivers on every system before updating.
If you don't already have these drivers, search by going to Windows Device Manager to see installed components, then go to each component's website and download the appropriate driver. Mainly video, audio, Ethernet and wireless devices (Bluetooth or Wi-Fi). Save all the found drivers as well as the necessary software on the USB drive for use when needed.
Collect all software CDs that connect devices like printers, PDAs or iPhods.
Make sure you have a valid Windows XP Pro installation CD and key. If you don't have a disc, you can borrow it from friends or colleagues .
You can obtain the activation key from Microsoft. All registered versions of Vista (including OEM agents of Vista Business and Vista Ultimate) can return to the old version of Windows. That means you are allowed to get a key that activates XP.
Finally, create a list of applications and utilities that need to be installed (or removed) after downgrade using Windows XP.
Back or simultaneously?
Now you can start the process if you want to change the system reinstallation or install more.
Additional installation is a less 'tough' option. Instead of completely removing Vista, you can install XP running in parallel with Vista, using both operating systems simultaneously. In this way, you put XP running as a main system, when needed to switch to Vista and gradually get used to its new interface.
Back to Windows XP
Boot the computer with Windows XP Pro disk. Most of the default computers set up to boot from the CD, but if your computer has not been set up yet, follow its documentation or search the net for how to set up the BIOS to allow the machine Boot from CD.

The first screen when booting with an XP CD, press the Enter key
When the XP Setup menu first appears, press the Enter key. Press F8 to agree with the company's license agreement then select the C: drive and press Enter .
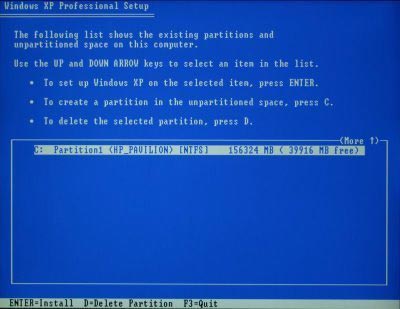
Note that if you encounter an error message stating that Windows cannot find any hard drive on the system, it may be because XP lacks the necessary drivers for newer SATA hard drives. Unfortunately, this is not easy to solve. Although your computer manufacturer has provided the necessary drivers and saved them on a floppy drive to be able to download them during the XP installation process. Boot from the XP disk, press F6 when the command prompt appears and hopefully the system can get the necessary drivers from the floppy drive. This solution may be also possible. If this is the case, try searching for a solution on Google or asking an expert from the company to provide you with assistance.
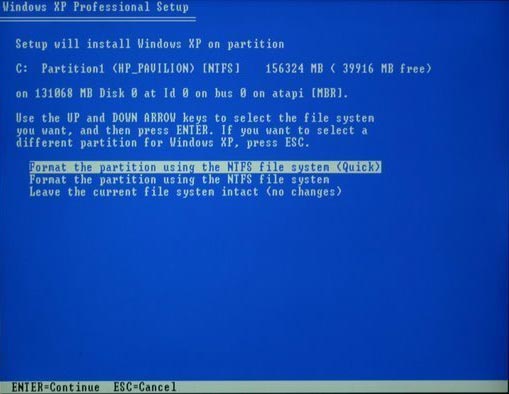
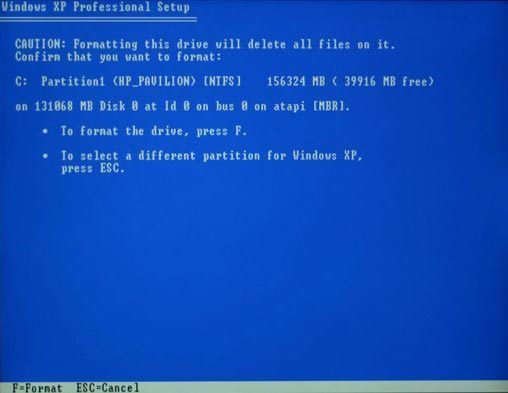
If you do not encounter that error, you will see the next screen, select the option to ' Format the partition using the NTFS file system (Quick) '. At the last screen, press F to format the drive. Please note that this will erase the entire C drive, you cannot return if selected.

Continue to follow step by step instructions given to install XP normally. The whole process takes about an hour.
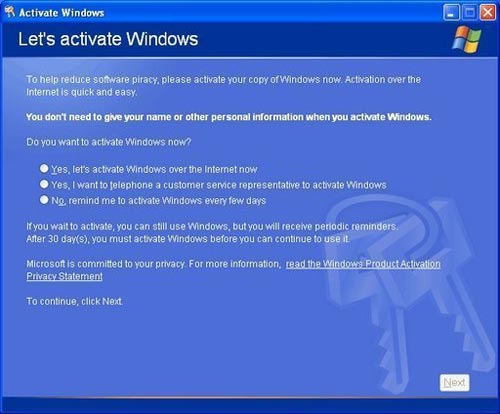
Select the option to have the key re-enable XP
When the installation of the operating system is complete, install the required drivers that you have saved. Adjust graphics settings, install the required applications, retrieve documents from storage locations and customize Windows to your liking.
Do not reactivate Windows until you are sure everything has worked as intended.
XP installation runs in parallel
To run two operating systems at the same time, you can think of a dual boot configuration: Vista on the main drive is installed, XP is installed in addition to a new partition. Every time you start your computer, you will select which operating system you want to boot. Setup is easy, you only need a few minutes more than the standard XP installation process. Do as follows:
 1. Click Start to enter the computer . Select Computer Management from the list that appears.
2. In the left pane, click Disk Management . In the middle, right-click on the C: drive and select Shrink Volume .
3. When the prompt appears, enter the total amount of free space you want to provide for a new partition, which will install XP. You can set a minimum of 10GB (ie, enter 10,000 in the field to be asked) or more if you want more space to run the necessary programs and store data.
4. Next you need to search for ' X gigabytes unallocated ', with X being the total amount of free space entered in step 3. Right-click the box and select New Simple Volume . Follow the steps to complete this section.
5. Exit the Computer Management utility and restart the computer with the XP installation disk in the drive. Follow the installation steps as above but make sure you choose the right new partition this time, not the C:
6. After you've installed XP, you'll need to run a free utility - VistaBootPRO to configure a boot menu for the system.
- Upgrading to Vista will lose Windows XP lock
- Windows Vista computer
- Join Vista with Vista Smoke Pro
- Microsoft allowed to switch from Vista to XP
- Microsoft prepares for the booming Vista ball
- Microsoft officially released Windows Vista RC1
- Bring Windows Vista's 3D Flip 3D effect to Windows XP
- Windows Vista will have 8 official versions
- Is Windows Vista really safe?
- Gartner corrected: Prepare to welcome Windows Vista or ... die
- 'Windows Vista will quickly replace Windows XP'
- Start Menu - Windows 'Heel' of Windows Vista
 What is the Snapdragon SiP chip?
 How to create a yellow circle around the mouse cursor on Windows
 Edit the Boot.ini file in Windows XP
 History of formation and development of computers