Instructions to create a notebook with elementary handwriting in Word
Do you want to design your own handwritten elf notebook with handwriting? With just a few steps in the tutorial below, you can quickly create a beautiful notebook template with the familiar Word document editing tool.
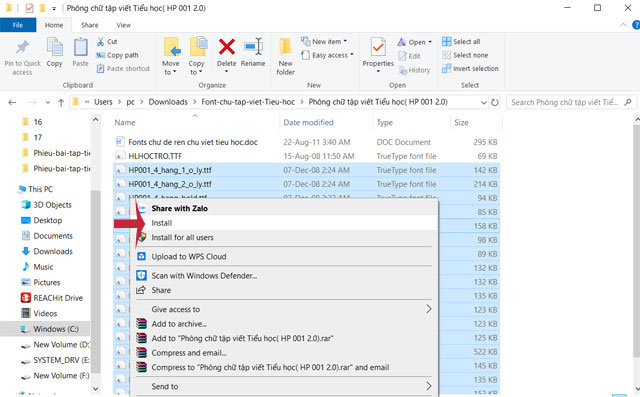
Step 1 : Download the font for Primary writing and unzip it, select the font to install and click Install to install the Primary font with cell on the computer.
Set the font.
Step 2 : Open Word, in Font section, select font: HP001 4 rows and 1 cell.
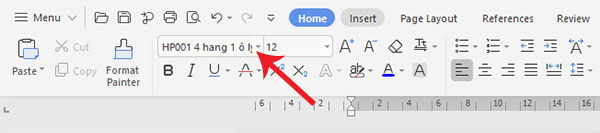
Select font HP001 4 rows 1 cell.
Step 3 : Next press Insert> Symbol> More Symbol . When the Symbol dialog box appears, in the Font section, choose HP001 4 rows and 1 cell, and in Subset, select Latin Extended-B. After that, click Insert to add the cell samples to the text.
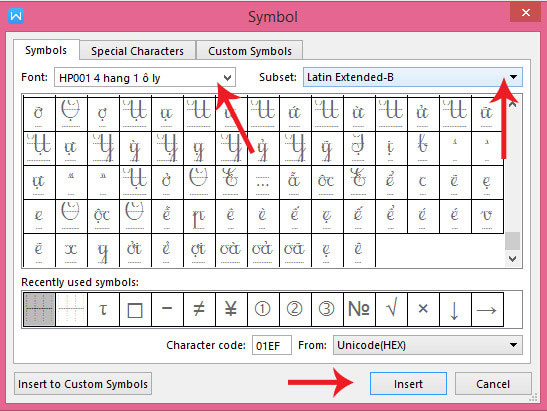
Symbol.
Step 4 : After adding enough lines, you just need to copy that line, and then paste down the successive lines of the bottom line to create a full page to make a word.
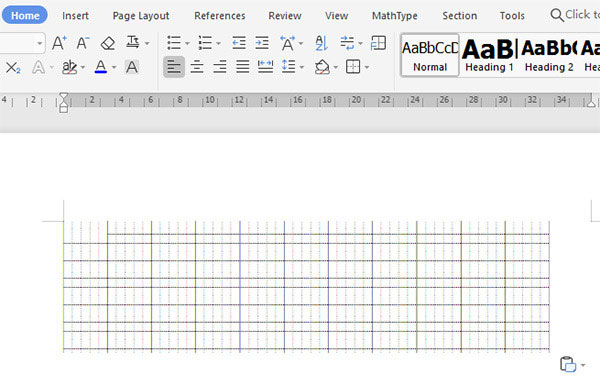
Insert a cell.
Step 5 : To make the rows fit together like an umbrella, go to Paragraph to adjust as the image below:

Paragraph.
Step 6 : To write handwriting on the newly created cell, go to Insert> Shape, select the square or rounded rectangle with the newly created cell.

Shapes.
Step 7 : Right-click, choose Format Auto Shape. Next, select No fill to display the subject cells under the shape just inserted, otherwise leave No fill will not see the cell.
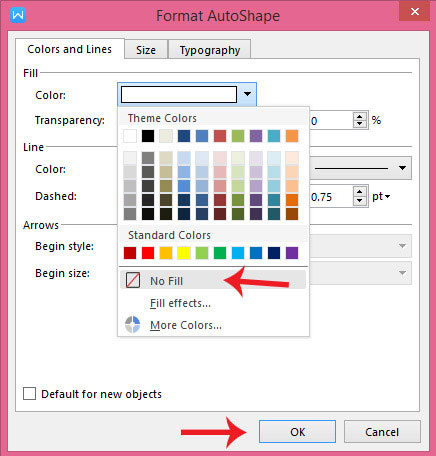
Format Auto Shape
Then choose the border color of the Shape, the size of the border and click OK to finish.
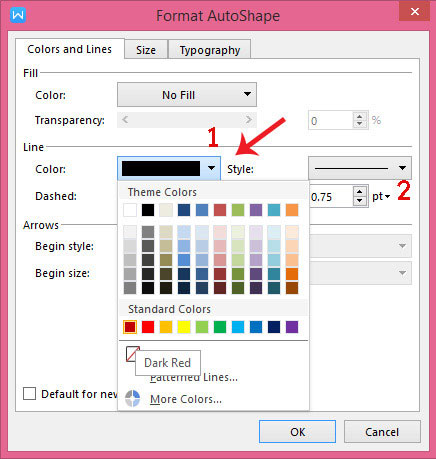
Select border.
Step 8 : To write text on the notebook just created, just right-click> Add text.
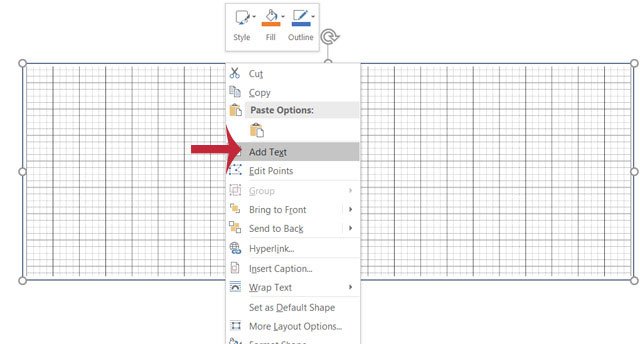
Add text.
Step 9: Then write on the glass that comfortable.
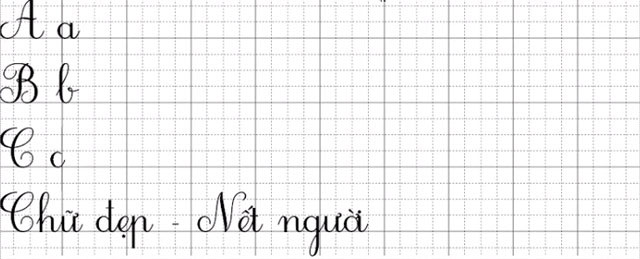
Write words.
So you can manually create notebooks with very beautiful glasses with the familiar Word word processing tool.
- Some tips when printing text in MS Word
- Instructions to transfer Word content to PowerPoint automatically
- Google supports handwriting input tools
- Thanks to handwriting robot
- Good handwriting for brains than typing
- Impressive notebook with double screen
- Barcode Works v3.2 - Add-ins insert barcodes in MS Word
- Why do young people need to re-learn handwriting?
- MS Word: Text paragraph format
- Written words reveal people's personality and health
- Why handwriting helps memorize better than typing?
- 9 best alternatives to Microsoft Word
- Create links (Link) in MS Word
- Create a border (border) for the entire text file
 What is the Snapdragon SiP chip?
 How to create a yellow circle around the mouse cursor on Windows
 Edit the Boot.ini file in Windows XP
 History of formation and development of computers